


The exact tightening of bolts and fasteners demands the essential tool which is a torque wrench to ensure safe operation and extended work lifespan. A 12 torque wrench stands as the optimal choice between options because it offers versatile precision metrics suitable for automotive maintenance and basic maintenance work.
Knowledgable users and experts depend on proper 12 torque wrench usage because it avoids both poor fastener retention from over-tightening and substandard installation from under-tightening which results in costly repercussions. This guide teaches you professional-level expertise for operating your 12 torque wrench which guarantees perfect outcomes during every use.
For further reading on Gadgets, visit Gadget Gids.
What Makes a 12 Torque Wrench Different?
A 12 torque wrench functions as the supreme torque tool since professionals name it both a 1/2-inch torque wrench because of its size dimension. A 12 torque wrench offers more power than 3/8-inch tools but exists between them and 3/4-inch industrial wrenches in terms of size. Here’s why it’s a favorite:
- Torque Range: The torque range of this tool extends from 20 and up to 250 ft-lbs which matches the requirements of lug nuts alongside engine components and robust machinery.
- Versatility: Works on cars, trucks, motorcycles, and even home projects like deck building.
- Durability: Built to withstand high-torque jobs without flexing or failing.
Unlike generic wrenches, a 1/2 inch torque wrench ensures bolts are tightened to exact specs—critical for everything from cylinder heads to suspension systems.
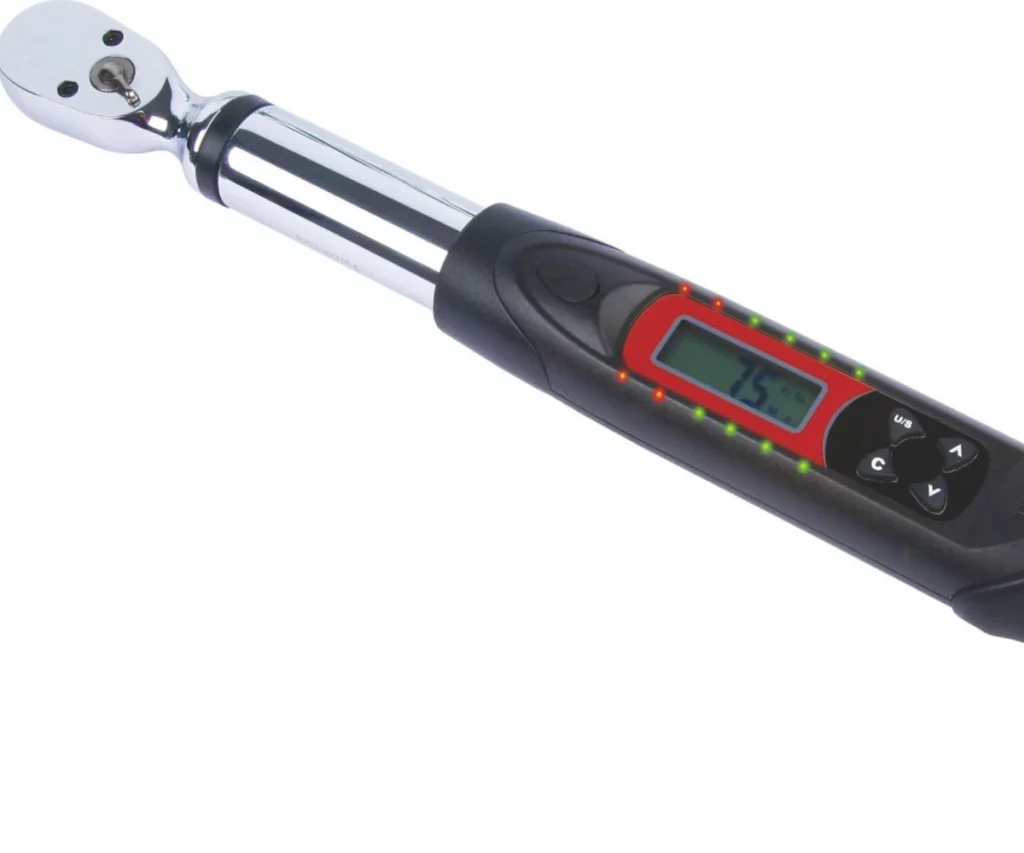
The Anatomy of a 12 Torque Wrench
Before you start cranking, know your tool. A 12 torque wrench has four key parts:
- Handle: Where you grip (duh). Look for ergonomic designs if you’re using it for hours.
- Drive Head: The square 1/2-inch drive where sockets attach.
- Scale/Display: Shows torque settings. Analog models have a rotating collar; digital ones flash or beep.
- Locking Mechanism: Locks your torque setting in place to prevent mid-job slips.
Most 1/2 inch torque wrenches are click-type (they “click” when you hit the set torque) or digital (with lights/beeps). Beam types are cheaper but less precise—great for beginners, frustrating for pros.
Prepping Your 12 Torque Wrench: Don’t Skip This!
Step 1: Set the Torque Value
- Loosen the lock nut at the handle’s base.
- Rotate the handle or dial to your desired ft-lbs (e.g., 90 ft-lbs for most car lug nuts).
- Re-tighten the lock nut.
Step 2: Calibrate or Cry Later
A 12 torque wrench is useless if it’s not accurate. Calibrate it yearly or after heavy use. DIY calibration kits cost $50, or send it to a pro.
Pro Tip: Always store your wrench at its lowest torque setting to keep the spring from wearing out.
Using Your 12 Torque Wrench Like a Boss
Step 1: Find the Right Torque Value
Check the manual for your car, bike, or project. No manual? Google it. Guessing = guaranteed regret.
Step 2: Apply Steady Pressure
- Attach the correct socket.
- Pull smoothly—no jerking!—until you hear the click or see the digital signal.
- Stop immediately. Over-tightening is worse than under-tightening.
Step 3: Double-Check Critical Bolts
For engine or suspension work, torque bolts in stages (e.g., 50% → 75% → 100%) to ensure even pressure.
Mistakes That’ll Make You Look Like a Rookie
- Over-Tightening: Strips threads, warps parts, costs $$$. The 12 torque wrench isn’t a breaker bar—respect the click!
- Ignoring Calibration: A $20 wrench off Amazon might be 20% off on torque. Good luck with that head gasket.
- Using the Wrong Drive Size: A 1/2-inch torque wrench needs 1/2-inch sockets. Don’t force a 3/8 adapter—it’ll skew readings.
Keep Your 12 Torque Wrench Alive Longer
- Clean It: Wipe off grease and dirt after each use. A grimy scale is hard to read.
- Store It Right: Keep it in its case, away from humidity. No tossing it in the toolbox with hammers!
- Recalibrate: If you drop it or use it daily, check calibration every 6 months.
Pro Tips for Next-Level Work
- Pair With Impact Tools: Use a Bauer 20V Brushless Cordless 1/2 in. High-Torque Impact Wrench to loosen stubborn bolts, then finish with your 12 torque wrench for precision.
- Sensitive Jobs: For engine internals (like connecting rods), torque in small increments and cross-reference with a manual.
- Lube Matters: Thread lubricant changes torque values. Check specs—some manufacturers require dry threads.
Conclusion
A 12 torque wrench isn’t just a tool—it’s insurance against costly mistakes. Whether you’re installing a lift kit or rebuilding a lawnmower engine, precise torque ensures safety and longevity.
Invest in a quality 1/2-inch torque wrench, treat it right, and it’ll pay for itself in saved headaches. Now go forth and tighten with confidence.
FAQs
How often do I need to calibrate my 12 torque wrench?
Calibrate it once a year, or after heavy use/drops. A $20 DIY kit works, but pros guarantee accuracy.
What happens if I ignore the ‘click’ and keep tightening?
You’ll strip threads or snap the bolt. The click means STOP—no extra heroics needed.
Can I use my 12 torque wrench to loosen bolts?
Nope—it’s for tightening only. Use a breaker bar or the Bauer 20V impact wrench for loosening.


